Currency
Toggle Nav


iPhone 15 Pro OLED Screen Replacement Assembly with Touch and Frame [OLED | TPH HARD] [Configuration and True Tone Ready]
Login to check stock and price
SKU
IPH-15P-SRN-HRD-DG
Steps to Install the Diagnostic-Compatible Soft OLED Screen
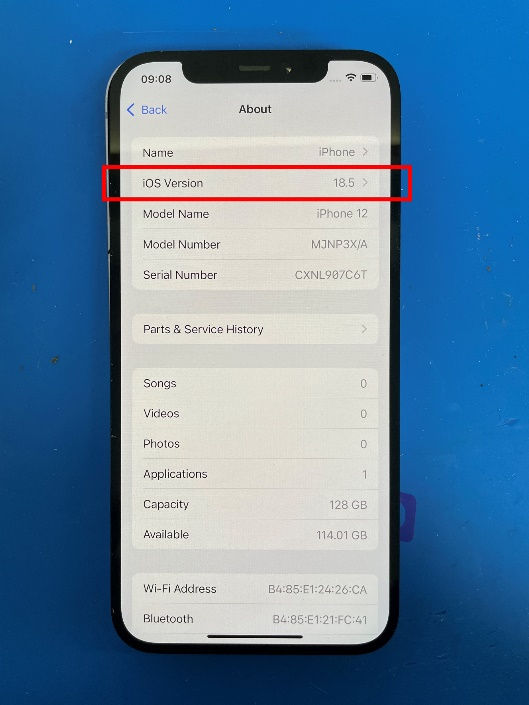
1. Ensure the device is updated to the latest iOS version.
For example, iOS 18.5 or later.
2. Install the TPH diagnostic-compatible soft OLED screen.
- No IC transfer is required.
- Do not program True Tone data, otherwise, the diagnostic process will fail.
- It is a simple plug-and-play.
3. Determine the screen type:
- If the screen comes with a front sensor:
- Connect both the screen and the front sensor cables.
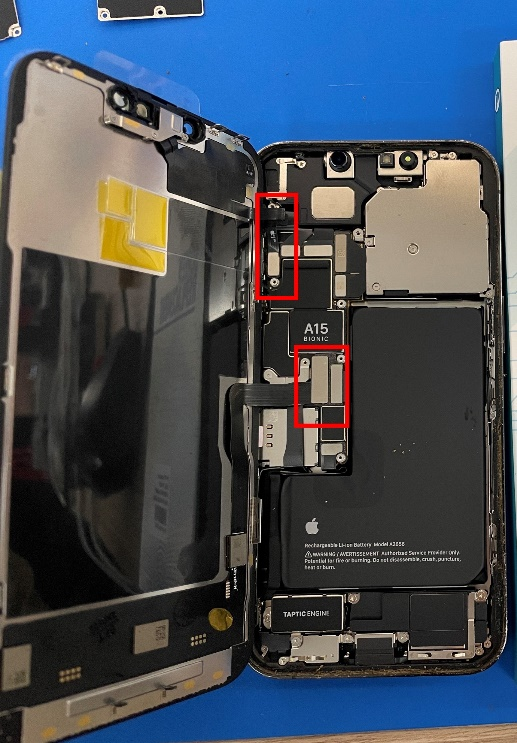
If the screen does not come with a front sensor:
- Only connect the screen. Do not connect the front sensor until after the diagnostic process is complete.
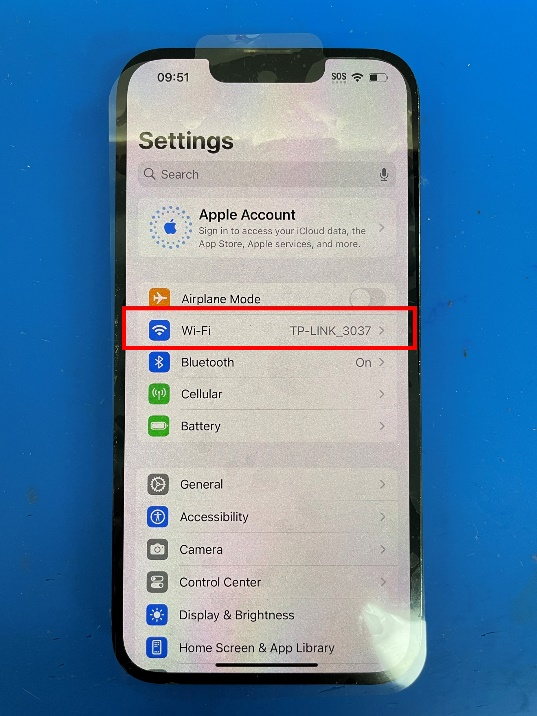
4. Connect the device to Wi-Fi.
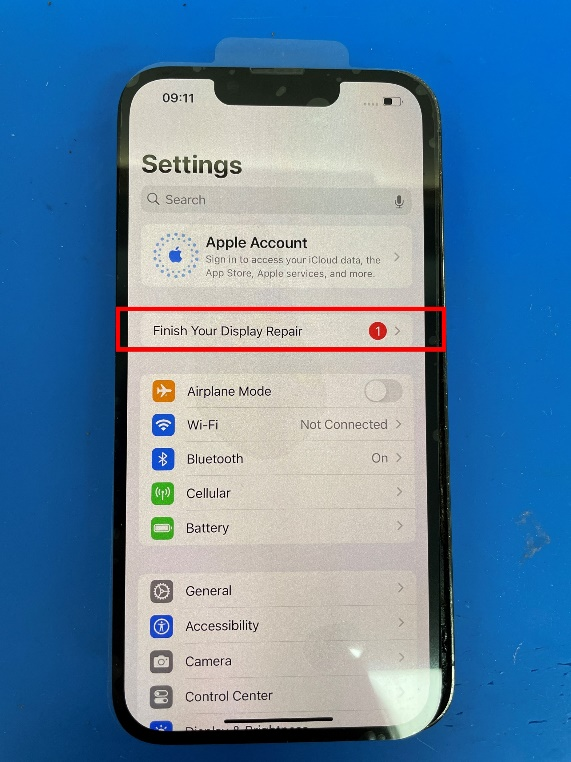
5. You may see a pop-up saying - Finish your display repair.
- If you do, tap it.
- If not, go to:
Settings - General - About - Parts & Service History
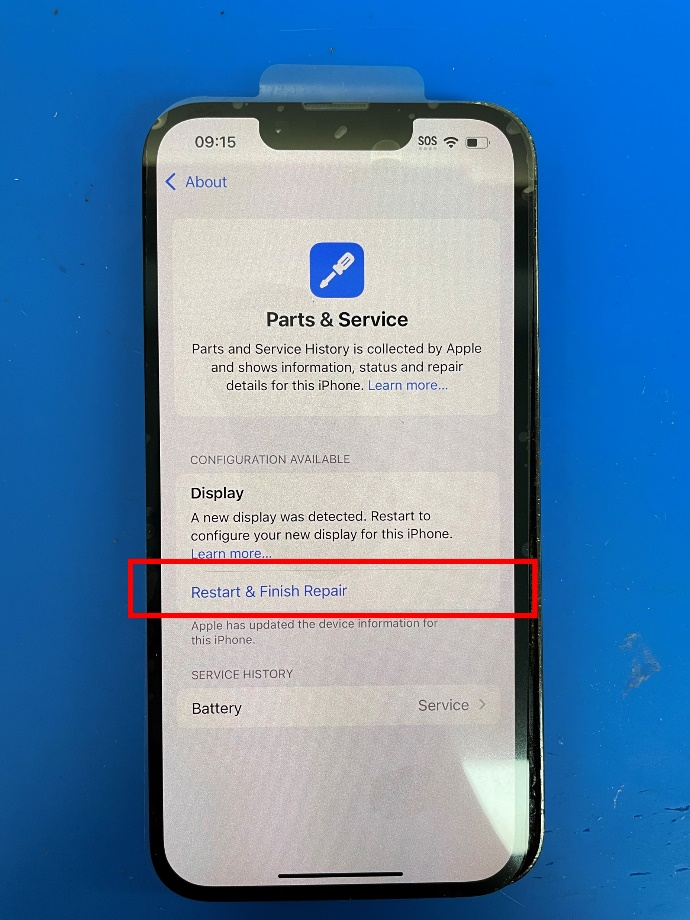
6. On the Parts & Service page, tap
Restart & Finish Repair
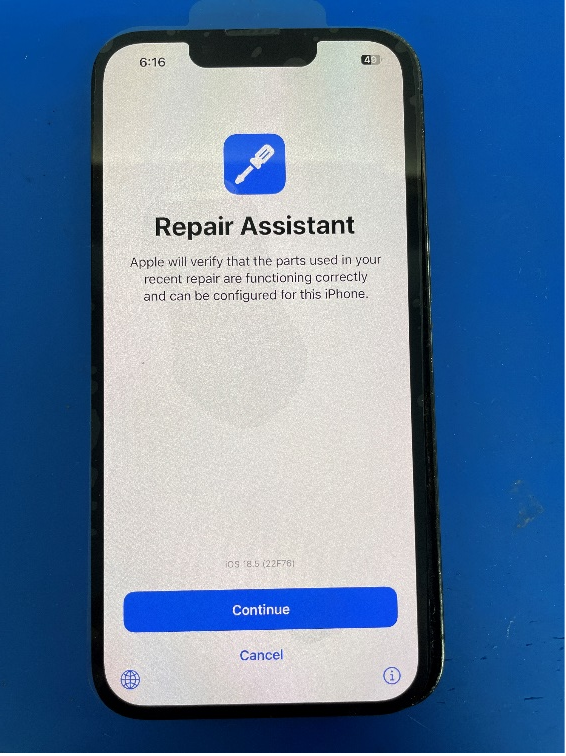
7. Follow the on-screen instructions in the Apple Repair Assistant.
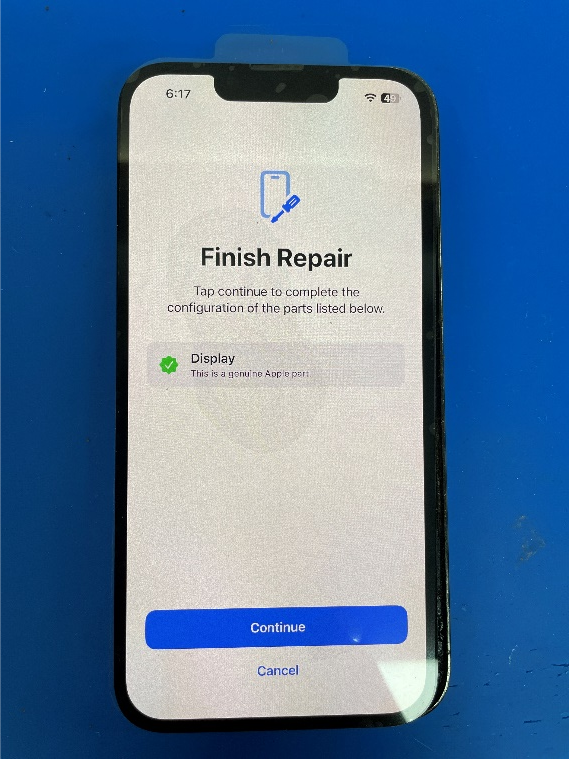
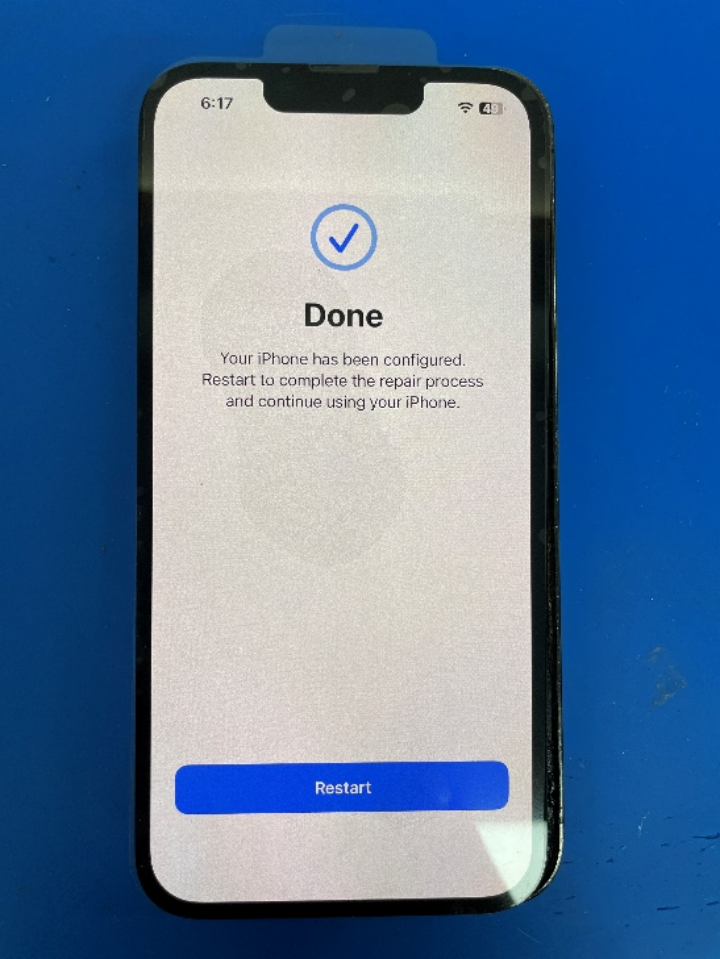
8. Once the device restarts and the process is complete:
- You should no longer see any warning or pop-up messages.
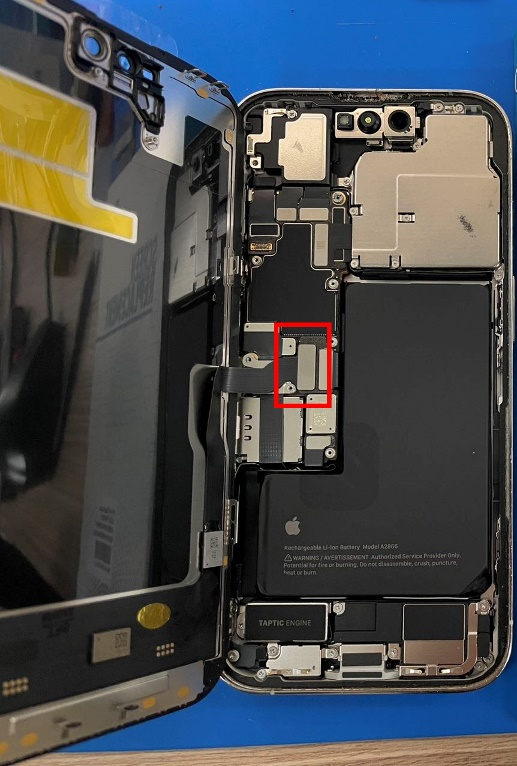
- If your screen did not come with a front sensor, now is the time to plug it in.
Make sure the device is powered off, connect the sensor cable securely, and then restart the device.

| Part Category | Screen |
|---|---|
| Is on Sale | No |
Write Your Own Review
The information below is required for social login
Sign In
Create New Account